I have to admit I was a little intimidated by the thought of doing this cake. After it was all said and done, I'm very happy with the end result. The definite key to this cake was in the silver food coloring spray I bought. It really finished off the cake and gave it a nice metal look to it.
I started off by making the front section of the gun (by the way, this is an AR 15, military assault rifle). The very end is made with fondant and I used a straw to carve out a small hole. The long, thin piece is a straw covered in fondant...this is the only inedible part of the cake. The black barrel was made out of Rice Krispie Treats and then covered in fondant.
The main part of the cake is the only real "cake" section. I used a template to cut a section out of a frozen piece of cake. It was much easier to cut this way. The scope on top is made from Rice Krispie Treats and each end has a rock candy piece of "glass".
All the little details on this section are made out of fondant mixed with gumtex.
The end section is also made from Rice Krispie Treats. The bottom of the black area is made with fondant and gumtex, left to dry so that it would hold it's shape.
I used a small paintbrush to add the color to the gun. I mixed a small amount of black into the silver color so that it would look more like metal.
This was not my "normal" type cake, but I was willing to take on the challenge anyway.
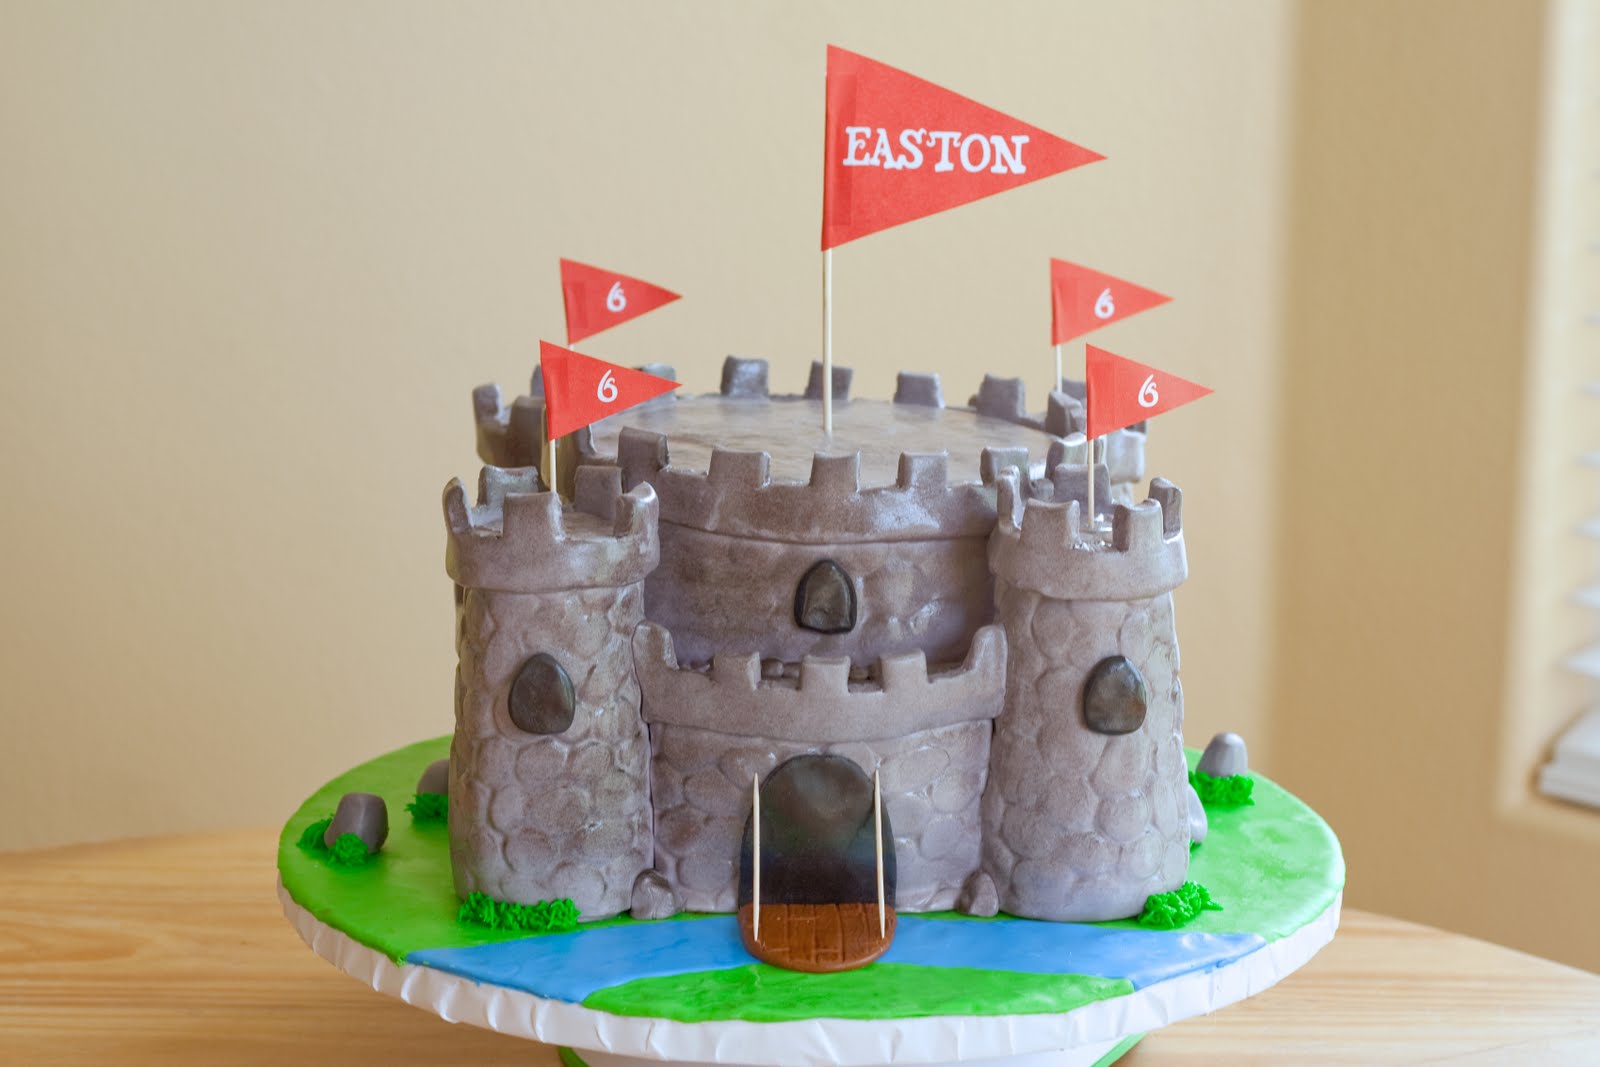
I know I always seem to say this, but this one was a lot of work! I had planned it a bit different initially, but as I was assembling the pieces, it got changed a bit. I'm happy with the final result though and actually think it turned out better this way.
The first thing I did after making the fondant (2 batches of grey fondant) is make the turrets (towers). They were made from Rice Krispie treats and I used a tall glass as the form.
Then I baked and frosted the cakes (10" & 8" rounds). I used the same glass that I made the turrets with to mark off small semi-circle areas on the bottom layer where I would be inserting them. I then cut those out with a very sharp knife. Once that was done I started adding fondant to the layers.
Starting with the bottom layer, I measured out the 4 small areas around the sides where I would be placing the fondant. After they were cut to size, I used a cobblestone impression mat to make the stone imprints onto the fondant.
I applied another layer of frosting as "glue" and placed the fondant onto the sides of the cake, being very careful not to make marks on the impressions. Once the sides were done, I used wax paper to cut out a template for the top. I followed the same method to place that onto the bottom layer.
For the top tier, I actually did it a bit different. I rolled fondant onto the cake and then used the impression mat on it afterwards. By this time, the cake was getting a little warm and it didn't take the impressions quite as well.
Next time, I will try doing the impression first before applying. I was just worried I would damage it as I was rolling it onto the cake.
For the turrets, I measured a piece that would wrap around and cut that out. I then frosted the towers and placed it down onto the middle of the piece of fondant. Then I wrapped the two sides around the tower and joined the two edges together. To make the impressions, I stood the tower up and gently rolled the impression mat around the towers. A small circular piece was added to the top of each tower.
 Next came the edging around the tops. That was a bit tricky. I added gumtex to the fondant and then cut out a long strip of fondant. I then cut notches out of the strip. I then added it to the towers and the top tier. After that, I placed the towers onto the cake using frosting as glue to hold them in place. I then added the remaining pieces in between the towers.
Before adding all the finishing bits (windows, doors, flags, etc), I covered the base with wax paper and used my airbrush to lightly coat the grey with black to give it the appearance of stone. I don't think I did so bad considering it was 1am at this point!
Next came the edging around the tops. That was a bit tricky. I added gumtex to the fondant and then cut out a long strip of fondant. I then cut notches out of the strip. I then added it to the towers and the top tier. After that, I placed the towers onto the cake using frosting as glue to hold them in place. I then added the remaining pieces in between the towers.
Before adding all the finishing bits (windows, doors, flags, etc), I covered the base with wax paper and used my airbrush to lightly coat the grey with black to give it the appearance of stone. I don't think I did so bad considering it was 1am at this point!
Lastly, I added the windows, the door (made with a wood grain impression mat) and placed the flags onto the top. I also added some extra stones around the base and some grass to complete the look.
Overall, this cake took about 15 hours to make.
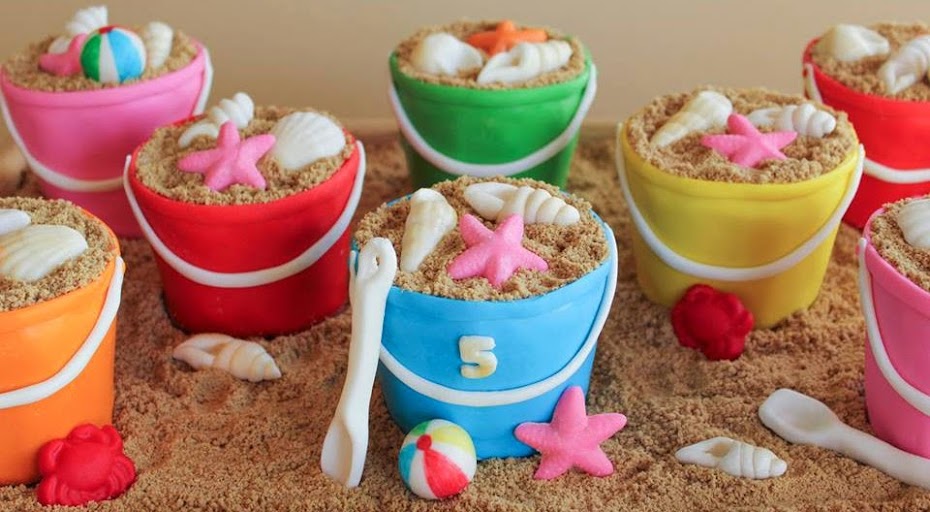
This is the only picture I managed to get of this cake before sending it on it's merry way. I made this for a friend's daughter. She helped make the fondant and baked the cakes and I did the decorating. I also made a real pretty "M" to go on the top, but you will have to use your imagination for that.
 I made these two figures for a friend of mine's twin boys. I used the book to trace the figures out of wax paper. After cutting them out, I placed them over the rolled fondant and then used a knife to cut around the edges. They are both completely made out of fondant and I also used edible writers to draw on some of the details.
As you can see, they are missing hands. This is because they will be hanging from vines and their claws will be added after they are placed on the cake. My friend will be finishing the rest of the details with the vines, branches, trees and leaves I gave to her. I can't wait to see the final cake!
 Wow! Was this cake A LOT of work! I lost count at about 15 hours or so!
I prepared the fondant a week in advance and spent the week before his birthday working on all of the figures. The more complex ones took about 45 minutes to an hour a piece because of all the coloring and detail involved. I also made the star ahead of time to give it time to harden. I added Gumtex to all the fondant figures so they would hold their shape well.
Wow! Was this cake A LOT of work! I lost count at about 15 hours or so!
I prepared the fondant a week in advance and spent the week before his birthday working on all of the figures. The more complex ones took about 45 minutes to an hour a piece because of all the coloring and detail involved. I also made the star ahead of time to give it time to harden. I added Gumtex to all the fondant figures so they would hold their shape well.
 This little guy on the right is my favorite I think (besides the cute little mushrooms next to him).
I also made a bunch of the bricks to place on the cake. I just cut the fondant into squares and then used a knife to make the grooves in the fondant.
This guy on the left was a bit tricky. I had to roll out a thin line of black fondant and then carefully place it on his face for the goggles. He also has a spiky Mohawk, which was super delicate.
Mario, on the right, was definitely the most time consuming. I first made the pipe he's coming out of and then formed his body and then head. I had to use toothpicks to keep his head stable on his body.
The mushroom was made out of formed Rice Krispie Treats covered in frosting and fondant.
Luigi wasn't as tricky, but that's only because it was a side view of him.
This guy on the right is called a Goomba. Doesn't look that complicated, but those teeny little teeth and eyebrows are so tricky to place onto such a small character. I also made a couple of those turtle shells to place around the bottom and some coins as seen on the game.
This little guy on the right is my favorite I think (besides the cute little mushrooms next to him).
I also made a bunch of the bricks to place on the cake. I just cut the fondant into squares and then used a knife to make the grooves in the fondant.
This guy on the left was a bit tricky. I had to roll out a thin line of black fondant and then carefully place it on his face for the goggles. He also has a spiky Mohawk, which was super delicate.
Mario, on the right, was definitely the most time consuming. I first made the pipe he's coming out of and then formed his body and then head. I had to use toothpicks to keep his head stable on his body.
The mushroom was made out of formed Rice Krispie Treats covered in frosting and fondant.
Luigi wasn't as tricky, but that's only because it was a side view of him.
This guy on the right is called a Goomba. Doesn't look that complicated, but those teeny little teeth and eyebrows are so tricky to place onto such a small character. I also made a couple of those turtle shells to place around the bottom and some coins as seen on the game.
The plant on the left is called a Piranha Plant. I really liked how this turned out for some reason.
The little fella on the right is a Toad.
I also included one of the flags that is found at the end of each level. It doesn't have the graphic that's on the flag in the game, but this was the last detail I did and by this point I was thoroughly exhausted with this cake. I decided to just let it go....not easy for me to do!
Here's a better view from the side. I also made a Flying Turtle. Originally, he was made to go on the side of the cake, but I ran out of room. I decided to put him on the top since he flies in the game anyway. I had to use toothpicks to hold him in place.
I decided to use my airbrush on this cake for the background. It came out darker than intended, but I like how it turned out anyway. My son went through the different "worlds" on the game to come up with an idea for the background. This "world" is a tropical one with sand dunes and palm trees. I think it all worked out well in the end and he was very excited to have his friends over to share his cake.


 Next came the edging around the tops. That was a bit tricky. I added gumtex to the fondant and then cut out a long strip of fondant. I then cut notches out of the strip. I then added it to the towers and the top tier. After that, I placed the towers onto the cake using frosting as glue to hold them in place. I then added the remaining pieces in between the towers.

 I made these two figures for a friend of mine's twin boys. I used the book to trace the figures out of wax paper. After cutting them out, I placed them over the rolled fondant and then used a knife to cut around the edges. They are both completely made out of fondant and I also used edible writers to draw on some of the details.
 Wow! Was this cake A LOT of work! I lost count at about 15 hours or so!


