Showing posts with label 2 tier cake. Show all posts

Wednesday, November 30, 2011

Baby Shoes

Here is my first baby shower cake!


This cake is a vanilla cake (8" and 10") with raspberry buttercream on the inside and vanilla on the outside.


I used a template to cut out the 3 main pieces of the shoe and then attached them all together.  For the laces, I used a clay extruder fitted with a small round hole.  It helped make the laces nice and even in size.  
This bow was actually my second bow.  I made a mistake with the first one by letting it dry near a window...sun is a no, no!  It bleaches the color right out of the fondant!  I guess you have to learn something new with each cake, right?!


I made the flowers before assembling the cake and let them dry on a curvy surface.  I used my ribbon cutter for the big stripes and cut the small brown stripes by hand.


I also made a small pacifier to sit on the top and decorated that with a small version of the flowers.  


In the end I think it turned out real cute!  Having 3 boys, it's always fun to make a girly cake once in a while!

Monday, September 12, 2011

Wedding Cake

This is an 8" square cake for the bottom tier and a 6" square tier for the top.

The bottom tier is a  Chocolate Pound Cake. It is made up of 3 layers with chocolate buttercream frosting in between each layer.  The outer layer of frosting is vanilla buttercream frosting so that it wouldn't show through the white fondant.  I used a pound cake due to the height and to give it extra stability.  I had never made a chocolate pound cake before, but I have to say....it was DELICIOUS!!

The top layer is Devil's Food Cake (3 layers) with the same frosting as the bottom tier.  

Both tiers were 4 inches tall.
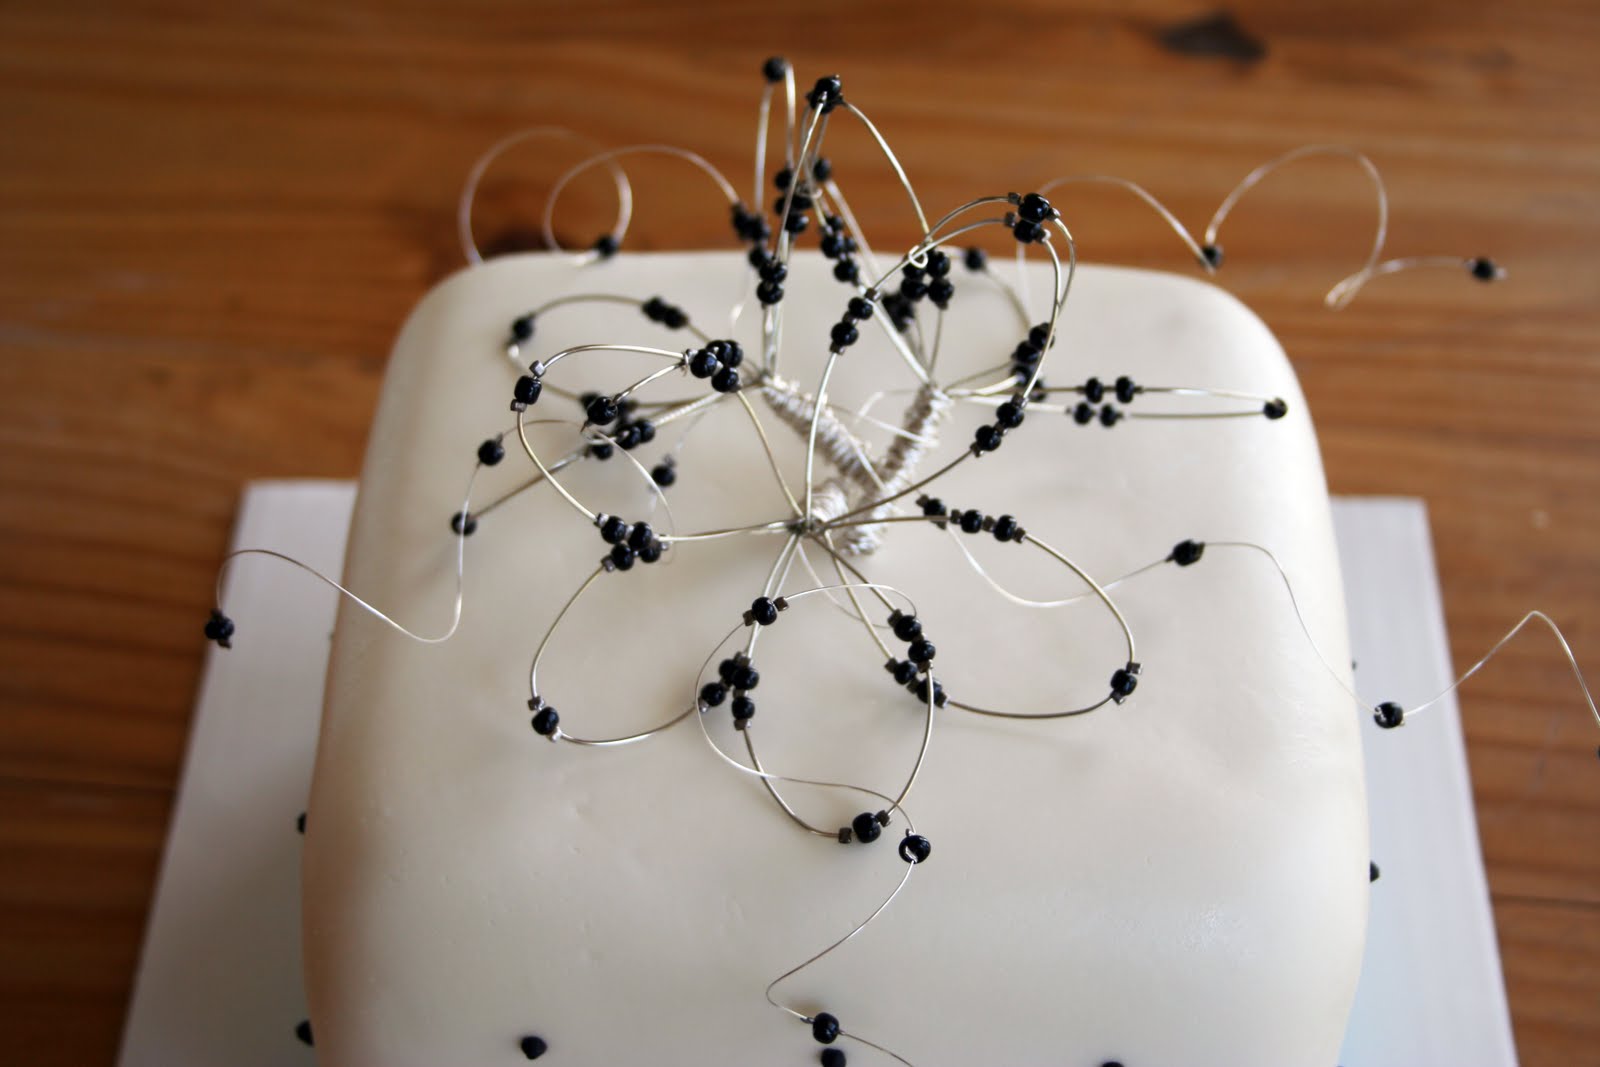
This is a picture of the top tier with the cake topper.  I made this topper based on the photograph I had been given.  At first, I wasn't sure how I was going to make this, but did some research on jewelry with wire/beads.  This topper consists of 3 wire/bead "flowers" that I arranged and wired together.  I also added some wire strings with beads.


I learned quite a bit making this topper and it was definitely a fun experience.  I guess I can add this form of artwork to my resume as well now.


I also got to make royal icing for the first time with this cake.  This is what I made the black dots out of.  First, I made measurements and marked the cake with an edible pen writer where the dots needed to be.  Then I just went back and added the dots with the royal icing.  They turned out really well.

The cake was finished off with some turquoise ribbon around the bottom of the tiers to match the bride/groom's colors.  This is the finished result on display at the wedding reception.

Monday, January 24, 2011

Crown Cake

My friend asked me to help her with her daughter's birthday cake, so of course I couldn't resist.  It was especially nice to work along a friend and talk while doing all the busy work.  Plus, up until that point I had never had the chance to do a girlie cake.  It was a nice change!

My friend had bought a pretty birthday banner with a cake on it, which is how we came up with the idea for this cake.  The buttons weren't on the cake in the banner, but we decided to incorporate them into the actual cake. 

The crown on the cake is probably my favorite part.  I rolled out a flat piece of fondant and then cut it into a crown shape.  In order to get it the right shape, I rolled it around a cup and let it dry in that position.  I also added gumtex to make the fondant stiffer.  My friend added some edible glitter and the button to complete the look. 

Sunday, January 23, 2011

Sports Cake


This sports cake was for my youngest son's 2nd birthday. He is a HUGE sports lover so this seemed rather appropriate for him.


This one took a really long time to make, especially with all the fine detail to the bat and balls on the top of the cake. Since they were small, they were a little hard to work with.


All of them are made out of fondant, even all of the laces on the balls. The stars were made with a cookie cutter as well as the bat and football on the side of the cake. The writing on the bat is made with a food coloring pen.


The top layer had vanilla frosting and the bottom had chocolate. Whenever you are using white fondant, you will need to use a light colored frosting so that it doesn't show through the fondant.

The Star Wars Cake

So having 3 boys, I was bound to do a Star Wars cake along the way. This cake was chosen by my middle son for his 6th birthday. For all you non Star Wars fans, it is a depiction of Tatooine (the home planet of Anakin and Luke Skywalker).

For the top layer I used frosting. Looking back, I probably should have done fondant. With this cake, I learned the big mistake with not doing what's called a "crumb layer". Basically, what that is is a thin layer of frosting over the cake to "trap" in the crumbs. After you do this, you place the cake in the fridge to allow the frosting to harden. Then, you do another layer of frosting that comes out nice and clean without any messy crumbs showing through. I had quite a few messy crumbs showing through the blue on this cake.....lesson learned!

The buildings of Tatooine are made from fondant as well as the "rocks" and moons. The sand on this cake is brown sugar. It was a bit darker than the Graham Cracker crumbs, which is why I chose to use that.

The characters are just the plastic figures. I have been asked why I didn't make them from fondant. Basically, I was only 3 weeks out from doing the Jungle Cake. I was still exhausted from that...lol!

Saturday, January 22, 2011


This was my first ever fondant cake. I saw a picture on a cake website and just HAD to make it for my son's first birthday. I knew nothing about fondant at the time so I did lots of research before attempting this big feat. Let's just say it was A LOT of work....and I mean a lot!


I started 2 weeks ahead of his birthday and spent pretty much every nap time and every evening learning about fondant. I taught myself how to make fondant, color fondant, roll it out, cut it into shapes and create these cute little jungle animals. I even had dreams about making cakes since that was all I seemed to be doing those 2 weeks!


I probably put in about 20 hours of work when all was said and done. It was well worth it though, because it was a huge hit at his party. Of course, nobody wanted to cut it up and eat it! I had to have my husband cut the cake while I looked away. At least it was really yummy and worth eating! I did save the animals and have since clear coated them. They now sit in my son's room on a shelf....a nice reminder of his special day!


This cake was vanilla with chocolate frosting on the bottom layer and chocolate cake with chocolate frosting on the top layer....as you might be able to tell I LOVE chocolate! Initially, I made chocolate fondant for the top layer, but it was a failure. As I layed it over the cake, it cracked around the edges. I think it was too dry with the added cocoa powder in the fondant. I will have to attempt that again someday down the road. Every decoration is made from fondant as well. In order to make the animals, I added something called Gumtex to the fondant. It helps give it a stiffer consistency so that the animals hold their shape. All of my fondant is homemade and basically consists of powdered sugar and marshmallows...marshmallow fondant (MMF). It is much cheaper to make and it tastes much better than store bought fondant. I also made my own frosting for the first time with cake...also much better!

Since then, I have pretty much done fondant for every birthday. I have also helped a few friends learn how to make fondant and have also made a couple cakes for customers. This was just the beginning of a whole new venture for me!

Over the next couple weeks (if I can find a spare moment) I will be posting a lot of the cakes I have done over the years. I will try to explain the process to give you an idea of what it takes to actually prepare these edible works of art.