I just entered the Mickey cake into a contest....http://family.go.com/2011-cake-contest/animals_and_characters/mickey-mouse-clubhouse-74825/
Please take a moment to vote if you can! You can vote once a day up until July 25th. Thanks!!

Cakes by Nicola
Sunday, June 26, 2011
Monday, April 25, 2011
Easter cake pops

For the bunnies, I used pastel Easter Candy Corn for their ears, heart shaped candy sprinkles for their noses and circles for their eyes.
For the chicks, I used flower candy sprinkles for their feet. I made their noses out of dyed white chocolate.

Overall, I spent a good few hours making all of these.

Saturday, April 16, 2011
Poker Chip Cake

I did get to use my new airbrush kit for the first time though. That was fun! Black is a horrible color to work into fondant, so I was very excited to get my airbrush in time to do this cake. It only took about 5 minutes as opposed to a good 30 minutes trying to kneed the color into the fondant.

Next, I cut out a circle of white to place in the center. I cut out a template using wax paper to get the "stripes" all the same size. Then, I added the small dashes around the circle.
I couldn't decide how to do the letters, which is where this cake started taking me more time. I liked the white with the red, but in order to make it stand out, I placed some black underneath it. That really made them "pop". In order to get nice looking letters, I printed some up from Photoshop and then traced them onto wax paper. I then place them on rolled out fondant and cut around the paper....not an easy task!
For the writing on the top/bottom, I was going to use my Wilton Food Writer. Problem was, it wasn't working well and it ran out of color! Ahhhh!!! So.....I opted for making them out of fondant. I really like the way they turned out, but it took me a LONG time!
 The final touch was the cake board...I covered it in green felt to look like a gambling table. Hopefully, this cake will be a big hit tonight!!
Beer Buttercream Frosting

I was asked to make an Anniversary cake (Poker Chip Cake) and they wanted me to make Beer Buttercream Frosting. I honestly had never heard of it, so I went in search of a recipe (I cut this recipe in half). This recipe calls for:
2 cups unsalted butter (room temp)
5 cups powdered sugar1/2 cup milk
1 whole scraped vanilla bean
1 tablespoon vanilla extract
2 cups Guinness Extra Stout Beer
 First, you need to reduce the beer by boiling it under low heat. This recipe stated 10-15 minutes, but it took me a lot longer (maybe I didn't have the heat high enough?). Once that is done, you will be left with about 2 tablespoons of a syrupy liquid (see below). Set it aside to cool.
Next, cream the butter in a mixer for about a minute. Start adding the powdered sugar, a little at a time, alternating with a little milk to keep it creamy.
Add the scraped vanilla bean (I left this part out) and vanilla extract.
Slowly add the reduced beer a little at a time. Taste test to the desired strength. I ended up using all of it.
 I have to say, I was a little curious wondering what the result was going to be. I personally don't like beer, but I was shocked how good this tasted. It's hard to describe, but it has a really nice flavor to it....goes VERY nicely with chocolate cake too!!
Wednesday, April 6, 2011
Tinkerbell


This cake was made using a Wilton's cake pan especially for doll cakes. I made a vanilla cake with homemade strawberry frosting. The cupcakes were also vanilla, but had homemade vanilla buttercream frosting.
I made the flowers and leaves a few days ahead of time. I got to use my new fondant drying trays that allow you to dry the flowers in a curvy shape.
After adding the white fondant to the cake, I made a small hole and poked the doll into the top of the cake.
For the body of the dress, I just cut out a piece of fondant and wrapped it around the doll's bodice and sealed it in the back with a touch of water. The wings just pressed right onto the fondant.
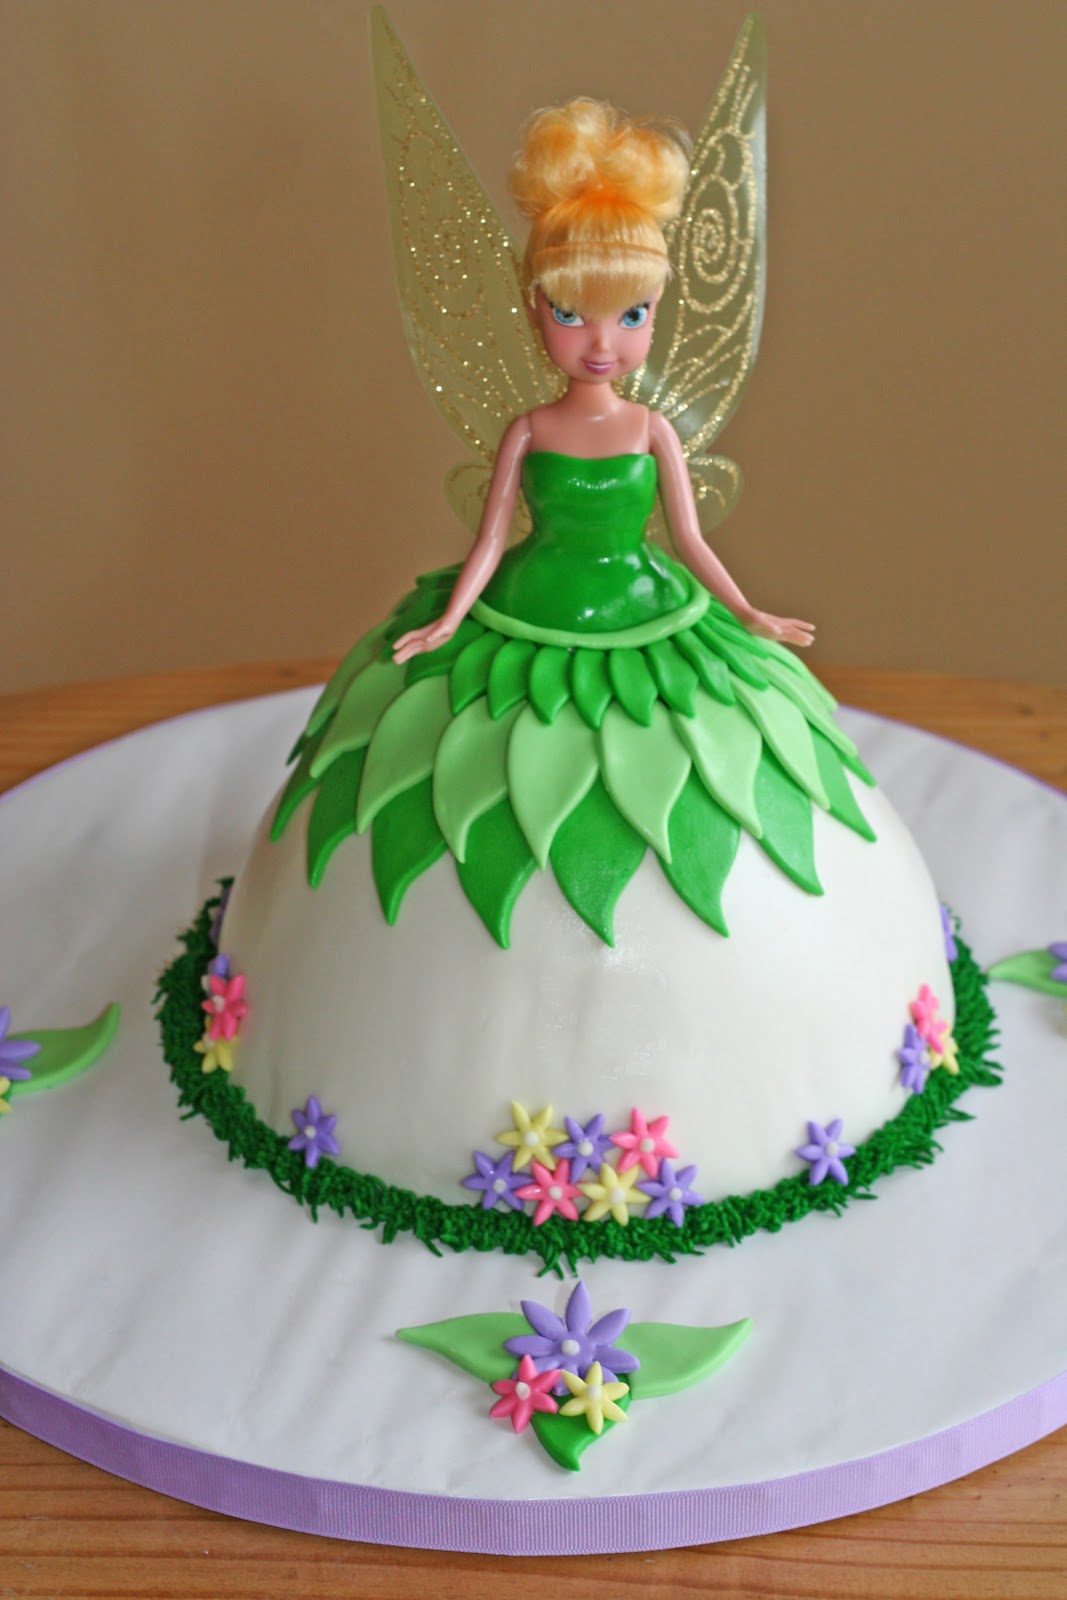
 I also did the grass on the cupcakes along with some fondant flowers so that everything matched. I'm really happy with how she turned out as it was exactly what I was aiming for.
 P.S. This cake/cupcakes took about 10 hours total.

Monday, March 14, 2011
My first wedding cake...
 I never thought I would actually do a wedding cake...been kind of caught up in the birthday cake thing I guess. My friend Brooke asked me to help out with her sister's cake, so of course how could I refuse? A chance to try something new!
 The idea for this cake was nothing like how it turned out. It was supposed to be just frosting with some decorative waves/lines on the sides and flowers on each level.
 After a couple hours trying to achieve the right look, we made a group decision to go with fondant. Brooke rushed off to the store before it closed and managed to get fondant ingredients just in time. Brooke prepared the fondant while I covered the layers and in two hours time we had done both cakes and cleaned up the evidence (as documented by this picture).

 By this time, the frosting had gotten a little warm so it was difficult to get it perfectly shaped. I had to put it in the fridge overnight and reshape in the morning. I can't say this was my most perfect fondant as I did have some wrinkles around the back of the large tier and the tall cake. I probably could have worked them out, but we decided not to spend more time on it (it was already 1am) since they were going to be covered with flowers. In the end, Brooke and her family decided to wrap some pretty ribbon around the bases, pin them together with boutonniere pins and place the flowers on the tops only. I really like how it turned out though....very clean and simple, but elegant at the same time. I can now say I've done a wedding cake and add that to my resume. I would love to take on some more cakes just like this and learn even more techniques/styles for wedding cakes.
 The tiered cake was made from Rice Krispie treats. We used a small glass bowl in the top tier and formed the treat around the bowl. It created a nice spot to place the flowers on the top. Being that it was a Rice Krispie treat cake, it would have been hard to poke the flowers in otherwise. The small cake, which was for the bride/groom is made out of vanilla cake with vanilla frosting. The flowers were inserted right into the fondant to hold them in place.
Monday, March 7, 2011
Duran Duran cake (for contest)

I have to say, I'm really proud of this cake. This is the first fondant cake I have done from start to finish that has been all my design. The art piece had to be something based on their latest album (above), which is how I came up with some of the design.


I also thought it would be really cool to add a record to the top to help symbolize the 80's, the decade I started listening to the group. I used a small basting brush to help make the grooves in the record. It was hard to get them to show up in the photo, but it looked really neat in person.

The band member silhouettes were actually one of my first ideas. I found the silhouettes online and used Photoshop to make them the right size. I printed them out, traced them onto wax paper, cut them out and placed them onto black fondant. I then cut around the shapes with a sharp knife. I used gumtex in the fondant to help make them stronger. I also found that dipping the tip of the knife into water helped make a nice, neat line around the shapes.

I definitely couldn't leave out the well known DD symbol, which I also printed/traced onto wax paper. The eye represents a song called "Being Followed" and the raindrops are for a song "Before the Rain". This was my first rope and it probably could have been much better if I had more time. I will have to work on that a little bit.

Here is the end result...The top layer is a Cocoa Krispie treat cake. My 2 year old is allergic to wheat and eggs so I wanted to make him something he could eat as well.
The bottom layer is dark chocolate cake with chocolate frosting...yummy!!!

I have submitted the cake into the contest... Voting begins on March 15th and ends March 28th....I will post the link when it becomes available.
If you would like to help me win....THANK YOU!!!!
**I didn't win...came in #14 or something like that. Someday, I WILL meet them...somehow.
Tuesday, February 15, 2011
My first cake pops...

Since I had some leftover cake from the tops I cut off the Valentine's Cake, I decided to try making some cake pops. These seem to be the latest trend so why not?! They really are quite simple to make.
First, you crumble up the cake using a fork or your hands (pictured above).
 Next, you mix in some frosting until it's a nice gooey consistency and sticks all together (left picture). I made my first batch of chocolate cream cheese frosting (yummm!!).
 Then, you roll the mixture into balls and place it onto wax paper.
  Next, melt some chocolate and dip popsicle sticks into the melted chocolate. Insert them into the cake balls and place the tray into the fridge or freezer (quicker) to cool. Once they are cool, they are ready to be dipped into melted chocolate. You can decorate however you wish...my boys wanted to use sprinkles. WOW!!! Were they yummy!!!

Saturday, February 12, 2011
Valentine's Cake

I was asked to teach a fondant class and since it's so close to Valentine's Day, I decided with this cake. I am always making chocolate cakes and figured I would branch out and try a homemade red velvet cake with cream cheese frosting.
Day #1: cake prep
I had to babysit yesterday (in addition to taking care of my 2 year old) and the only time I had to bake this cake was during naptime. Rush, rush, rush....
I mixed all the ingredients and while I was doing so heard one of the little ones starting to wake up. I quickly finished, threw it into the oven and by that time all was quiet again so I started washing dishes. All of a sudden, I realized that I had left out the cocoa! Ahhhhh!!! I ripped the cakes out of the oven (8 minutes into cooking), hoping that I could somehow salvage the cake. Luckily, not much had cooked except for the very bottom. I poured the batter back into the now clean mixing bowl, added the cocoa and had to prepare the cake pans all over again. Save number one...


We had a really nice class and this was a good chance for me to try out placing fondant over a heart shaped cake. It was a lot easier than I was expecting...a nice change to the day before!

This was my second bow like this and I'm starting to get much faster with it. This picture shows how I put the bits of paper towel in the bow loops to hold them in place for drying. The flowers were really quite simple. I used a flower cutout and then carved grooves into the petals.
I wasn't sure how I wanted to finish the bottom and I didn't have much room to play with, so I just used a very thin rope around it. Tomorrows the day we find out if it tastes as yummy as it looks!!

Day #3: Taste test!
Today we finally got to taste the cake! I can't say I would trade in my chocolate cake for this, but it was definitely yummy! It looked really pretty too!

I even decided to try making some cake pops with the leftover cake tops that were cut off the cake. Check them out here, http://cakesbynicola.blogspot.com/2011/02/my-first-cake-pops.html
Monday, January 24, 2011
Gender Reveal Cake

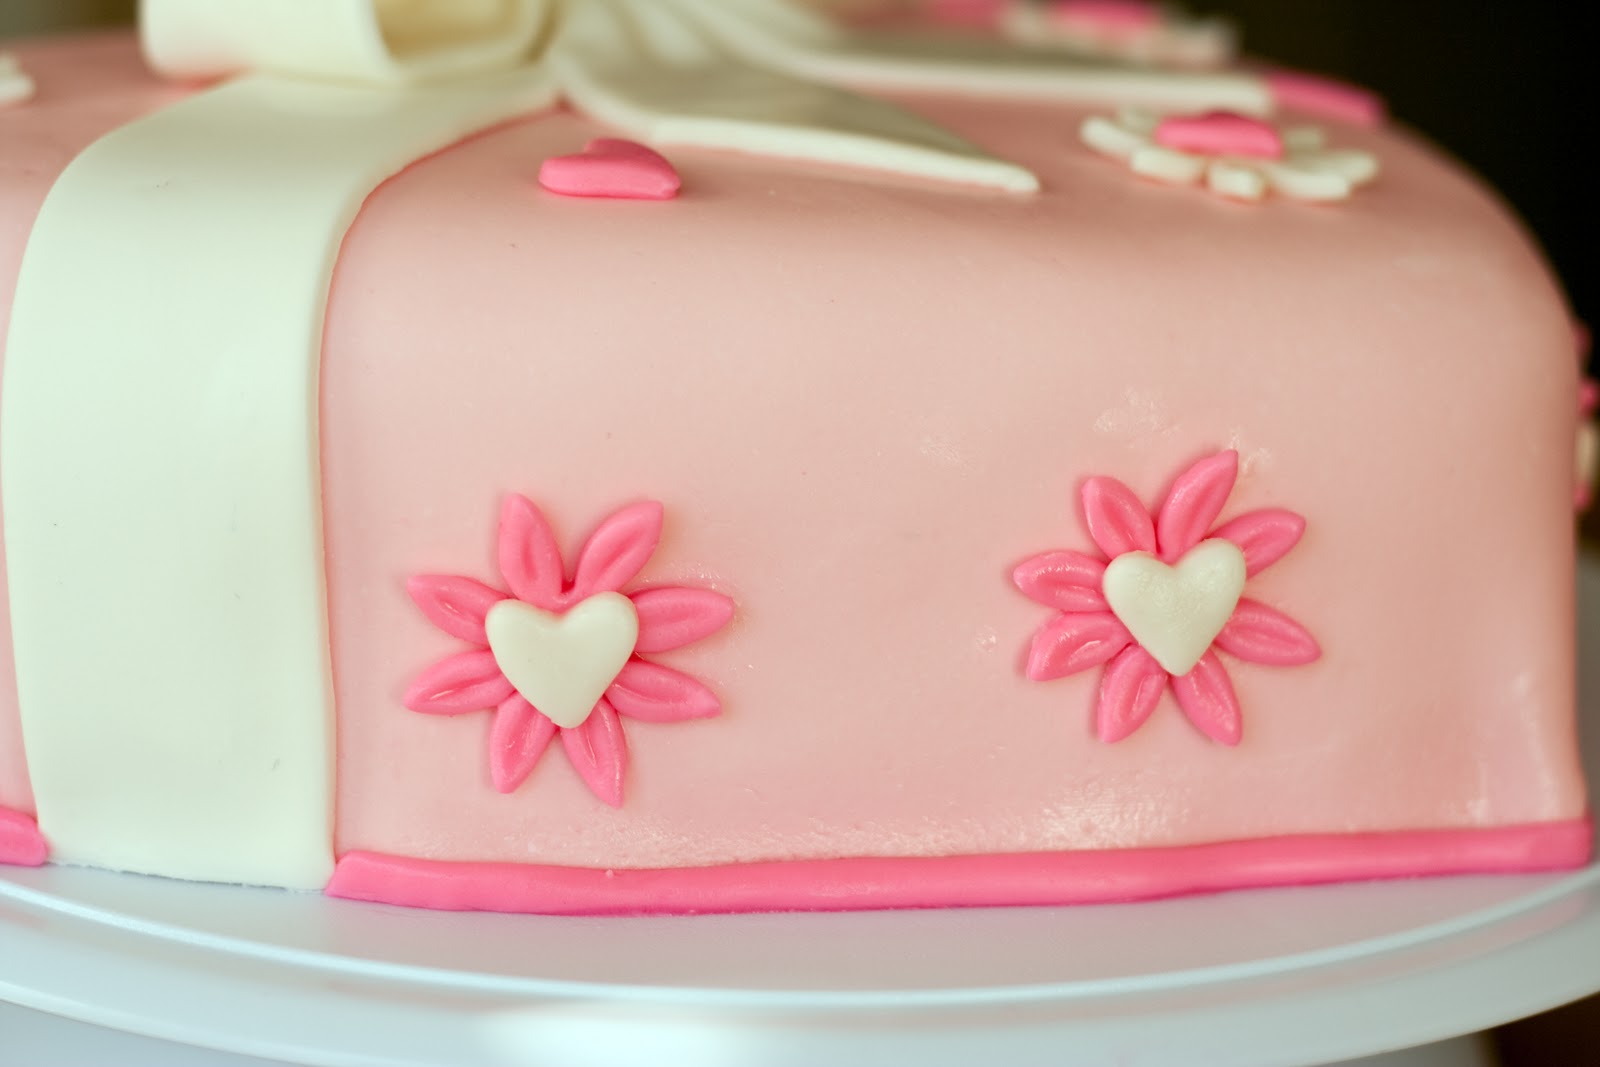
This was a cake for a gender reveal party an expectant mom was having. The color of the frosting inside was to reveal whether the baby was a boy or a girl.
This cake was a vanilla cake and I made pink frosting based on the results of her ultrasound. This was my first large bow like this. I made it a couple days in advance and used bits of paper towel in each bit to allow it to dry in the right shape. It worked!

I glued fondant circles on the cake board to give it some added detail.
I was really happy with this cake! What a great way to find out what you are having!!
 This is what the cake looked like before all the decorations. My first square fondant cake....
Yankee Cake

It was a departure from my usual fondant cakes, but still used a lot in the decorations. The actual cake was frosted and topped using a grass tip.
I made the hat, the ball and the NY symbols earlier in the week. I didn't do the shirt until that morning since I didn't want it to dry out.


For the shirt, I made templates out of wax paper and used them to cut the shapes out of rolled fondant. I then used my rolling tool to make a small groove in the fondant for the stripes. Then, I cut very thin navy blue stripes and placed them into the grooves. Next, I added the NY symbol.
 The ball was quite simple. I just drew the stitching on with a red food coloring pen. After it was all done, I decided to add buttons to the shirt. I just felt it was missing something without them. My husband thought I was nuts! He's probably right....
Farm Animals

These are some little farm animals I made to send to my friend. She made a Thomas the Train cake for her son's 2nd birthday and I offered to help with these animals. They were so cute!
Zebra Stripe Cake

This cake was based of a picture I was given. I added a necklace and a bracelet to it because the birthday "girl" likes jewelry.
This cake was a lot more time consuming than I had anticipated. It took about 12 hours total. I made the numbers and the bow ahead of time (about 2-3 days in advance) with gumtex/fondant and had them dry. It was my first time making a bow and I'm quite happy with how it turned out. The bow is made out of three strips of fondant bent into shape. I placed some paper towel in the rungs to hold it in shape while it dried for about a day. I usually leave these types of things out for a day and then after that, store them in the fridge until I'm ready to use them.
 The zebra stripes are pretty easy to make. I had bought a new rolling tool so that made it much easier. It just takes a lot of time to actually arrange them onto the cake. Plus, you really have to be careful with black fondant. If you get it wet (which you need to "stick" it to the cake), the color runs. A big problem when you are placing it onto white fondant where it will show very easily.
 I used kabob sticks to hold up the numbers (they were quite heavy) and made a hole in the top to insert the candles.
The necklace and bracelet were a lot of fun to make. I took equal portions of the purple, white and green fondant and rolled them into balls to give the appearance of a rock. It really came out quite real looking.

Subscribe to:
Posts (Atom)