Monday, March 14, 2011

My first wedding cake...

I never thought I would actually do a wedding cake...been kind of caught up in the birthday cake thing I guess.  My friend Brooke asked me to help out with her sister's cake, so of course how could I refuse?  A chance to try something new! 

The idea for this cake was nothing like how it turned out.  It was supposed to be just frosting with some decorative waves/lines on the sides and flowers on each level.
After a couple hours trying to achieve the right look, we made a group decision to go with fondant.  Brooke rushed off to the store before it closed and managed to get fondant ingredients just in time.  Brooke prepared the fondant while I covered the layers and in two hours time we had done both cakes and cleaned up the evidence (as documented by this picture). 


By this time, the frosting had gotten a little warm so it was difficult to get it perfectly shaped.  I had to put it in the fridge overnight and reshape in the morning.  I can't say this was my most perfect fondant as I did have some wrinkles around the back of the large tier and the tall cake.  I probably could have worked them out, but we decided not to spend more time on it (it was already 1am) since they were going to be covered with flowers.  In the end, Brooke and her family decided to wrap some pretty ribbon around the bases, pin them together with boutonniere pins and place the flowers on the tops only.  I really like how it turned out though....very clean and simple, but elegant at the same time.  I can now say I've done a wedding cake and add that to my resume.  I would love to take on some more cakes just like this and learn even more techniques/styles for wedding cakes.        
The tiered cake was made from Rice Krispie treats.  We used a small glass bowl in the top tier and formed the treat around the bowl.  It created a nice spot to place the flowers on the top.  Being that it was a Rice Krispie treat cake, it would have been hard to poke the flowers in otherwise.  The small cake, which was for the bride/groom is made out of vanilla cake with vanilla frosting.  The flowers were inserted right into the fondant to hold them in place.                                                       


Monday, March 7, 2011

Duran Duran cake (for contest)

To say I am a HUGE Duran Duran fan it an understatement, so when I saw they were having an art contest for a chance to win concert tickets and meet and greet passes, I couldn't pass it by.  Hours spent slaving over a cake would be worth it!


I have to say, I'm really proud of this cake.  This is the first fondant cake I have done from start to finish that has been all my design.  The art piece had to be something based on their latest album (above), which is how I came up with some of the design. 

One of the first ideas I had was pretty easy because of a song titled "The man who stole a leopard".  I wasn't quite sure how to make these spots at first, but figured out an easy way.  I just flattened out a piece of black, added a flattened piece of brown to the top and then rolled over them with a small rolling pin.  It helped mesh them together nicely.


I also thought it would be really cool to add a record to the top to help symbolize the 80's, the decade I started listening to the group.  I used a small basting brush to help make the grooves in the record.  It was hard to get them to show up in the photo, but it looked really neat in person.


The band member silhouettes were actually one of my first ideas.  I found the silhouettes online and used Photoshop to make them the right size.  I printed them out, traced them onto wax paper, cut them out and placed them onto black fondant.  I then cut around the shapes with a sharp knife.  I used gumtex in the fondant to help make them stronger.  I also found that dipping the tip of the knife into water helped make a nice, neat line around the shapes.


I definitely couldn't leave out the well known DD symbol, which I also printed/traced onto wax paper.  The eye represents a song called "Being Followed" and the raindrops are for a song "Before the Rain".  This was my first rope and it probably could have been much better if I had more time.  I will have to work on that a little bit.


Here is the end result...The top layer is a Cocoa Krispie treat cake.  My 2 year old is allergic to wheat and eggs so I wanted to make him something he could eat as well.
The bottom layer is dark chocolate cake with chocolate frosting...yummy!!!


I have submitted the cake into the contest...  Voting begins on March 15th and ends March 28th....I will post the link when it becomes available.

If you would like to help me win....THANK YOU!!!!


**I didn't win...came in #14 or something like that.  Someday, I WILL meet them...somehow.

Tuesday, February 15, 2011

My first cake pops...


Since I had some leftover cake from the tops I cut off the Valentine's Cake, I decided to try making some cake pops.  These seem to be the latest trend so why not?!  They really are quite simple to make.

First, you crumble up the cake using a fork or your hands (pictured above).

Next, you mix in some frosting until it's a nice gooey consistency and sticks all together (left picture).  I made my first batch of chocolate cream cheese frosting (yummm!!).


Then, you roll the mixture into balls and place it onto wax paper. 

Next, melt some chocolate and dip popsicle sticks into the melted chocolate.  Insert them into the cake balls and place the tray into the fridge or freezer (quicker) to cool.  Once they are cool, they are ready to be dipped into melted chocolate.  You can decorate however you wish...my boys wanted to use sprinkles.  WOW!!! Were they yummy!!!

Saturday, February 12, 2011

Valentine's Cake

I've decided that I would really like to hire a baker.  This cake decided to really test my skills. 

I was asked to teach a fondant class and since it's so close to Valentine's Day, I decided with this cake.  I am always making chocolate cakes and figured I would branch out and try a homemade red velvet cake with cream cheese frosting. 

Day #1:  cake prep

I had to babysit yesterday (in addition to taking care of my 2 year old) and the only time I had to bake this cake was during naptime.  Rush, rush, rush....
I mixed all the ingredients and while I was doing so heard one of the little ones starting to wake up.  I quickly finished, threw it into the oven and by that time all was quiet again so I started washing dishes.  All of a sudden, I realized that I had left out the cocoa!  Ahhhhh!!!  I ripped the cakes out of the oven (8 minutes into cooking), hoping that I could somehow salvage the cake.  Luckily, not much had cooked except for the very bottom.  I poured the batter back into the now clean mixing bowl, added the cocoa and had to prepare the cake pans all over again.  Save number one...


Later that afternoon, after letting them cool, it was time to get them out of the pans.  Layer number 1 cracked a little bit, but I was able to piece the small piece back in...no problem.  Layer number 2 on the other hand was a disaster!  The whole bottom of the cake (about 1/2 inch) decided to stick to the pan.  Oh no!!!  This is where save number 2 comes in....I had to scrape the whole bottom out real careful and flip it over onto the piece that was already out.  Not an easy task!  Now it was time to put the two layers together.  Somehow I managed to get them lined on top of each other okay, but you could really see a nice crack around the bottom layer all the way around.  At this point, I had to decide if I still wanted to attempt carving out a heart shape and possibly causing more damage.  Well, I decided to go for it...you never know unless you try right?!  I cut out a heart shape from wax paper and placed it over the cake to used as a guide.  It turned out quite well considering it could have fallen apart even more.  Now it was time to really put my icing skills to the test.  I had to fill in quite a bit of breaks with the frosting, but the above picture shows how it turned out after the crumb coat....not too shabby considering the mess it was in.  I was very proud of myself for fixing what could have been a major cake disaster. 

Day #2: cake class

We had a really nice class and this was a good chance for me to try out placing fondant over a heart shaped cake.  It was a lot easier than I was expecting...a nice change to the day before! 


This was my second bow like this and I'm starting to get much faster with it.  This picture shows how I put the bits of paper towel in the bow loops to hold them in place for drying. The flowers were really quite simple.  I used a flower cutout and then carved grooves into the petals. 


I wasn't sure how I wanted to finish the bottom and I didn't have much room to play with, so I just used a very thin rope around it.  Tomorrows the day we find out if it tastes as yummy as it looks!!


Day #3:  Taste test!

Today we finally got to taste the cake!  I can't say I would trade in my chocolate cake for this, but it was definitely yummy!  It looked really pretty too!

I even decided to try making some cake pops with the leftover cake tops that were cut off the cake.  Check them out here, http://cakesbynicola.blogspot.com/2011/02/my-first-cake-pops.html

Monday, January 24, 2011

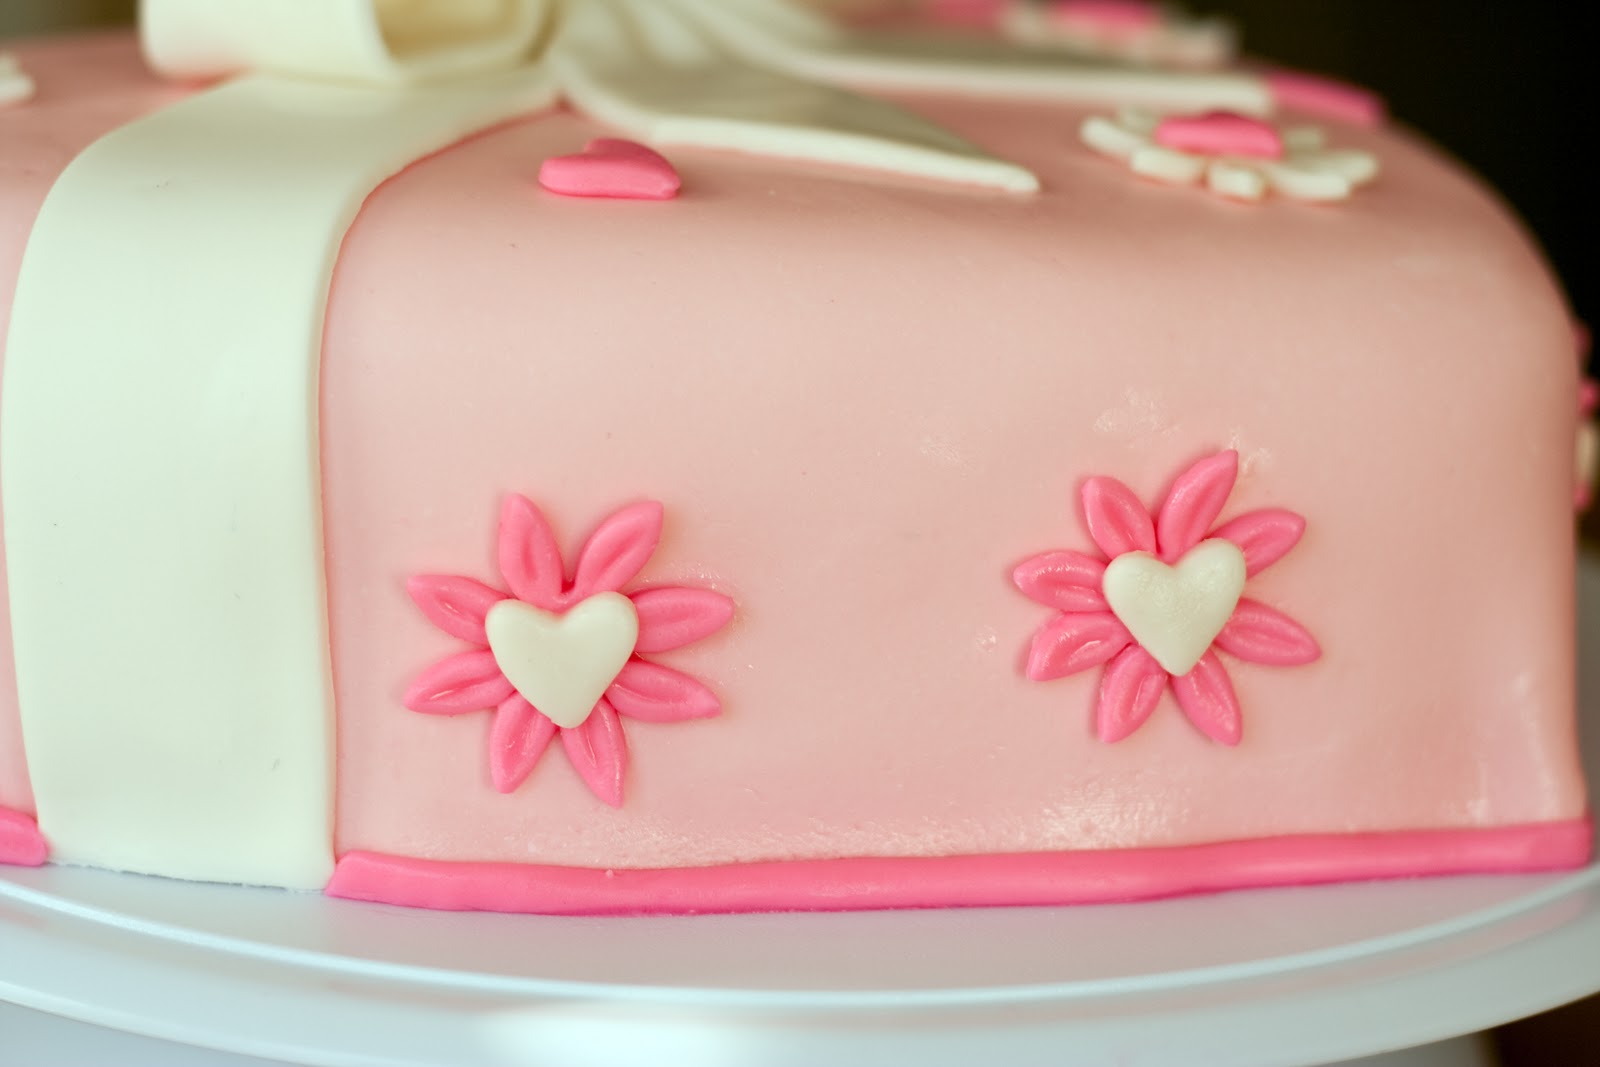
Gender Reveal Cake

This was a cake for a gender reveal party an expectant mom was having.  The color of the frosting inside was to reveal whether the baby was a boy or a girl.

This cake was a vanilla cake and I made pink frosting based on the results of her ultrasound.  This was my first large bow like this.  I made it a couple days in advance and used bits of paper towel in each bit to allow it to dry in the right shape.  It worked!  

I glued fondant circles on the cake board to give it some added detail.

I was really happy with this cake!  What a great way to find out what you are having!!


This is what the cake looked like before all the decorations.  My first square fondant cake....


Yankee Cake

My oldest son is a HUGE baseball fan and especially loves the Yankees.  We found the idea for this cake online and I instantly knew this was the one I wanted to do.

It was a departure from my usual fondant cakes, but still used a lot in the decorations.  The actual cake was frosted and topped using a grass tip. 

I made the hat, the ball and the NY symbols earlier in the week.  I didn't do the shirt until that morning since I didn't want it to dry out.

The hat was definitely my favorite part of this cake.  I had always admired these fondant baseball hats, but up until now have never attempted one.  It really wasn't too bad.  I made a dome shaped cocoa krispie treat and covered it in chocolate frosting.  I then layed the navy blue fondant (a mix of blue and black gel food color) over the dome.  I did the stripes with my awesome little rolling tool that has a wheel to make stitching.  For such a simple little tool, it really gives it such great detail.  The rim was a little tricky trying to get it to fit right, but it turned out just how I wanted it to. 

The NY symbols took a little bit of time.  Not because they were that hard, but because I had to make them small enough to fit.  The one on the shirt wasn't so bad, but the one on the hat was a little hard to work with.  Actually, I was a bit surprised how well they turned out. 

For the shirt, I made templates out of wax paper and used them to cut the shapes out of rolled fondant.  I then used my rolling tool to make a small groove in the fondant for the stripes.  Then, I cut very thin navy blue stripes and placed them into the grooves.  Next, I added the NY symbol. 

The ball was quite simple.  I just drew the stitching on with a red food coloring pen.  After it was all done, I decided to add buttons to the shirt.  I just felt it was missing something without them.  My husband thought I was nuts!  He's probably right....

Farm Animals


These are some little farm animals I made to send to my friend.  She made a Thomas the Train cake for her son's 2nd birthday and I offered to help with these animals.  They were so cute!

Zebra Stripe Cake

Another cake with the dreaded purple fondant.  At least there wasn't as much this time around!  The lime green color was a little tricky.  It is a combination of yellow and green gel food coloring....a touch more of yellow than green.

This cake was based of a picture I was given.  I added a necklace and a bracelet to it because the birthday "girl" likes jewelry.

This cake was a lot more time consuming than I had anticipated.  It took about 12 hours total.  I made the numbers and the bow ahead of time (about 2-3 days in advance) with gumtex/fondant and had them dry.  It was my first time making a bow and I'm quite happy with how it turned out.  The bow is made out of three strips of fondant bent into shape.  I placed some paper towel in the rungs to hold it in shape while it dried for about a day.  I usually leave these types of things out for a day and then after that, store them in the fridge until I'm ready to use them.

The zebra stripes are pretty easy to make.  I had bought a new rolling tool so that made it much easier.  It just takes a lot of time to actually arrange them onto the cake.  Plus, you really have to be careful with black fondant.  If you get it wet (which you need to "stick" it to the cake), the color runs.  A big problem when you are placing it onto white fondant where it will show very easily. 

I learned a trick while putting the ribbon around the bottoms of the cake.  It helps to "fold" up the strips of fondant and sort of roll them out while placing them around the cake.  It prevents the strip from getting warped as you are trying to do it. 

I used kabob sticks to hold up the numbers (they were quite heavy) and made a hole in the top to insert the candles. 

The necklace and bracelet were a lot of fun to make.  I took equal portions of the purple, white and green fondant and rolled them into balls to give the appearance of a rock.  It really came out quite real looking. 

I got to use my new cake board my dad made for me.  I just covered it in white wrapping paper and decorated with ribbon.

Halloween Spider Cake

I must have been on a cake roll because after I finished my friends cake, I decided I needed to surprise my boys with a Halloween cake.  

Let's just say that purple fondant is NOT an easy accomplishment!  It probably took me a good 45 minutes to get this color the way I wanted it (mixing blue and red food gel).  One day, maybe I can afford an airbrush kit so I don't have to spend so much time coloring the fondant.  

After struggling with the purple, I had to attempt the web.  I wasn't having a steady hand day so it was quite hard to get the web to look ok.   

The spider was a lot of fun.  I used lots of gumtex in the head and body to help hold the round shape.  I made that a day in advance to give it time to dry.  The legs I just rolled into ropes and formed them onto the sides.  In order to get more than one thing the same size, it helps to make equal size balls of fondant before shaping them.  I then added the eyes and the fangs to complete the look. 

The pumpkins I made into different sizes and carved lines into them.  Some of them I added just stalks and others both stalks and leaves.  The leaves were a little tricky because they were so small.  They did add such a great touch to them though.  For some of them I added some vine and attached them to the pumpkin plants.  Finally, I added some graham cracker crumbs for dirt to give it the finishing touch.  You can really by looking at the picture on the right how all the small details really make the cake what it is.                                                                                                                                                                                                  


Crown Cake

My friend asked me to help her with her daughter's birthday cake, so of course I couldn't resist.  It was especially nice to work along a friend and talk while doing all the busy work.  Plus, up until that point I had never had the chance to do a girlie cake.  It was a nice change!

My friend had bought a pretty birthday banner with a cake on it, which is how we came up with the idea for this cake.  The buttons weren't on the cake in the banner, but we decided to incorporate them into the actual cake. 

The crown on the cake is probably my favorite part.  I rolled out a flat piece of fondant and then cut it into a crown shape.  In order to get it the right shape, I rolled it around a cup and let it dry in that position.  I also added gumtex to make the fondant stiffer.  My friend added some edible glitter and the button to complete the look. 

Karate Gi Cake

My son had recently started to do karate so we decided to choose something to reflect that.  I came across a karate gi cake online that I decided to try out.  This was my first attempt at a non-round fondant cake. 

This cake is a single layer 9x13 cake, which I carved small indents out of the side.  In order to make it a bit easier to lay down the fondant, I made two individual pieces...one for the top half of the cake and the other for the bottom half.  I figured the belt was going to cover the seam anyway, so I might as well make it easier.

The belt is three pieces....one strip going across, a strip for the ties and another for the knot.  For the edges of the gi, I cut three strips and made small indented lines with a knife.  I now have a rolling tool that makes these stripes...much easier! 

I was a little nervous about making the Yin Yang symbol, but it was much easier than I thought it would be.  I just used a cookie cutter to make a circle of each color and then I cut away what wasn't needed.  Then I just made a small indent to insert the opposite color in each half.  To make the bottom of the cake neater, I rolled out a black rope and just fit it around the cake. 

Of course, the cake itself was chocolate with chocolate frosting....what else!?

Sunday, January 23, 2011

Sports Cake


This sports cake was for my youngest son's 2nd birthday. He is a HUGE sports lover so this seemed rather appropriate for him.


This one took a really long time to make, especially with all the fine detail to the bat and balls on the top of the cake. Since they were small, they were a little hard to work with.


All of them are made out of fondant, even all of the laces on the balls. The stars were made with a cookie cutter as well as the bat and football on the side of the cake. The writing on the bat is made with a food coloring pen.


The top layer had vanilla frosting and the bottom had chocolate. Whenever you are using white fondant, you will need to use a light colored frosting so that it doesn't show through the fondant.

Black Forest Cake

Not quite as exciting as the other cakes, but this was my first attempt at a Black Forest Cake.  My dad has wanted one for a while and I finally made him one for Christmas. 

I made my own whipped cream frosting, which was then generously spread on the top and side of the cake.  In between the two layers of cake is a layer of whipped cream and glazed cherries.  I shaved some dark chocolate and just applied it to the side of the cake with a spatula.  It made a huge mess.  There must be a better way to do that.  Anyone want to share?

Ice Age Cake


My oldest son chose an Ice Age cake for his 9th birthday. I used icing to give it that snowy look.
The characters, eggs and acorns were all made out of fondant. The faces on the egg were drawn on with a food coloring pen. I made the "ice" with sugar candy. It was the first time I had used this and it was a lot of fun to do. I just poured the melted sugar onto a pan, let it cool and then cracked it to form the ice.
I was so happy with the way Scrat and Sid came out and I had planned on preserving them like I had the jungle animals. Apparently, my dog had other ideas because she ended up eating them. By the time I caught her, only part of Sid's body was left. It was very sad!
Here is Scrat before he was eaten...check out his fang teeth!

The Star Wars Cake

So having 3 boys, I was bound to do a Star Wars cake along the way. This cake was chosen by my middle son for his 6th birthday. For all you non Star Wars fans, it is a depiction of Tatooine (the home planet of Anakin and Luke Skywalker).

For the top layer I used frosting. Looking back, I probably should have done fondant. With this cake, I learned the big mistake with not doing what's called a "crumb layer". Basically, what that is is a thin layer of frosting over the cake to "trap" in the crumbs. After you do this, you place the cake in the fridge to allow the frosting to harden. Then, you do another layer of frosting that comes out nice and clean without any messy crumbs showing through. I had quite a few messy crumbs showing through the blue on this cake.....lesson learned!

The buildings of Tatooine are made from fondant as well as the "rocks" and moons. The sand on this cake is brown sugar. It was a bit darker than the Graham Cracker crumbs, which is why I chose to use that.

The characters are just the plastic figures. I have been asked why I didn't make them from fondant. Basically, I was only 3 weeks out from doing the Jungle Cake. I was still exhausted from that...lol!